The Making of Mjolnir
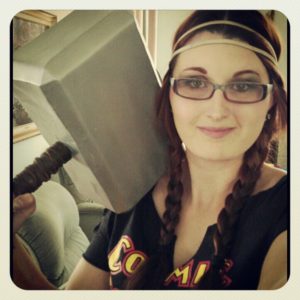
I decided that for the upcoming Avengers movie release & Cosmic Comic’s Free Comic Book Day event I would be cosplaying as female version of Thor. Upon this decision I looked online to purchase a Mjölnir since I figured a month was not enough time to forge the weapon of the God of Thunder. I quickly discovered many easy, quick ways to create my own… plastic bottles, duck tape, paper craft, foam, etc… I pondered all these options but became rather fixed on the idea of a metal hammer. Something more realistic and that would have actual weight to it.
So I discussed my scheme with my dad, who was a certified welder and had done it as a job for over 9 years. My dad is THE jack of all trades, but with his arthritis things are hard… I decided if I was going to take on this project I wanted it to be done as a father/daughter project. It is MY project, MY cosplay & MY final decision on all aspects of it… but having a certified welder by my side to coach me who is also my dad, well to me that’s epic on multiple levels and I have no shame in admitting my father is a master and I am still his padawan in all things fabricating and welding related.
To start off we purchased all the required materials:
- multiple sheets of 16g steel
- 1 wooden dowel
- 1 lag bolt & nut
- a small container of wood stain (Kona)
- Flat black primer
- Metallic spray paint
- Glazing & Spotting Putty
- Body Filler
- Leather Lace 1/4 in. in Brown
- Expanding Foam (to deaden sound since it is hollow)
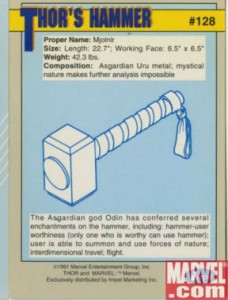
We then sketched out the basic idea of dimensions, I figured would be best as a more feminine sized hammer…. since Thor’s is something like 22in. and that would look ridiculous wielded by me ;D
This boys & girls is the only specs, tutorial or example I had for what I intended to create…
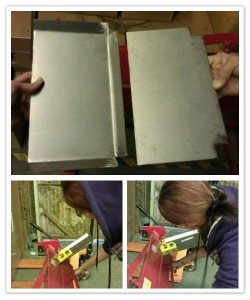
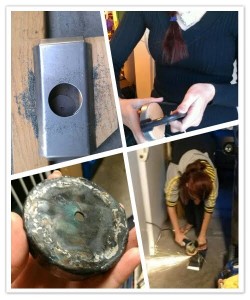
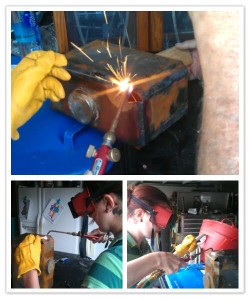
- To start off we needed a base (the section that all sides would be attached to as well as the handle) so we welded two 16g steel plates together, drilled a hole through the middle of each and secured a lag bolt & nut through it. Threaded the wooden dowel so it would screw onto the bolt and then tack welded the bolt to to base.
- The next step was measuring out each of the sides and the top of the hammer. Using a metal straight-edge, two clamps and an awl we marked each of the pieces of steel where they needed to be cut. Using a cut off wheel attached to our air compressor we cut each piece of steel and then bent each piece individually.
- After all the pieces were bent to exact angles, we tested how it all fit (using magnets), tack welded the two longest sides onto the base and then moved onto the top. I cut a hole into the top piece (using a circle saw) and then 2 small strips of steel to form and then tack weld to the cut out piece to create the ‘cap’ of the hammer. After tack & final welding I grinded it down flat and shiny, using body putty to fill any gaps and then sanding it down.
- After the top was on we cut the final side pieces down to fit and tack welded them down, the only pieces left to attach were the tiny triangular corners and each of those are slightly varied in size. Leaving those for last we then began the final weld on the bottom portion (the base). Due to the high possibility of warpage we decided to tack weld every few inches and work tiny sections at a time, cooling the entire hammer as we went on. While this was tedious and time consuming it was the best way to avoid lots of heat warping. ***Video: Final Weld to Base***
- While the hammer was cooling I took the wooden dowel and screwed it onto a stable surface. Using paper towels I then stained the wood to the color with the Kona colored stain.
- The following day (I had to refill the acetylene tank) I finished all the final welds to each side and began sizing & cutting each triangular corner.
- After the entire hammer was final welded on all sides I began the clean-up process of grinding it. A lot of grinding needed to be done to it to clean it up due to the surface rust caused by the constant cool down process.
- We applied body filler to any low spots, let it set for 30 min. and then sanded it down.
- While waiting for the body filler to dry we wrapped the handle in leather, applying superglue to a few areas to secure it.
- Applied a few coats of flat black primer and allowed it to dry overnight.
- Painted each side with several coats of metallic spray paint. (**I may end up stripping the paint and engraving it at a later point, I haven’t decided**)
- Drilled two small holes where the handle would cover and filled it with expanding foam (one to use to fill it, the other for ventilation)
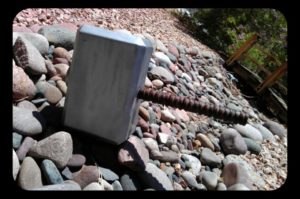
it could be so nice if you could give me the dimensions you used, I want to do this on my own, but I sadly have no idea how ^^’